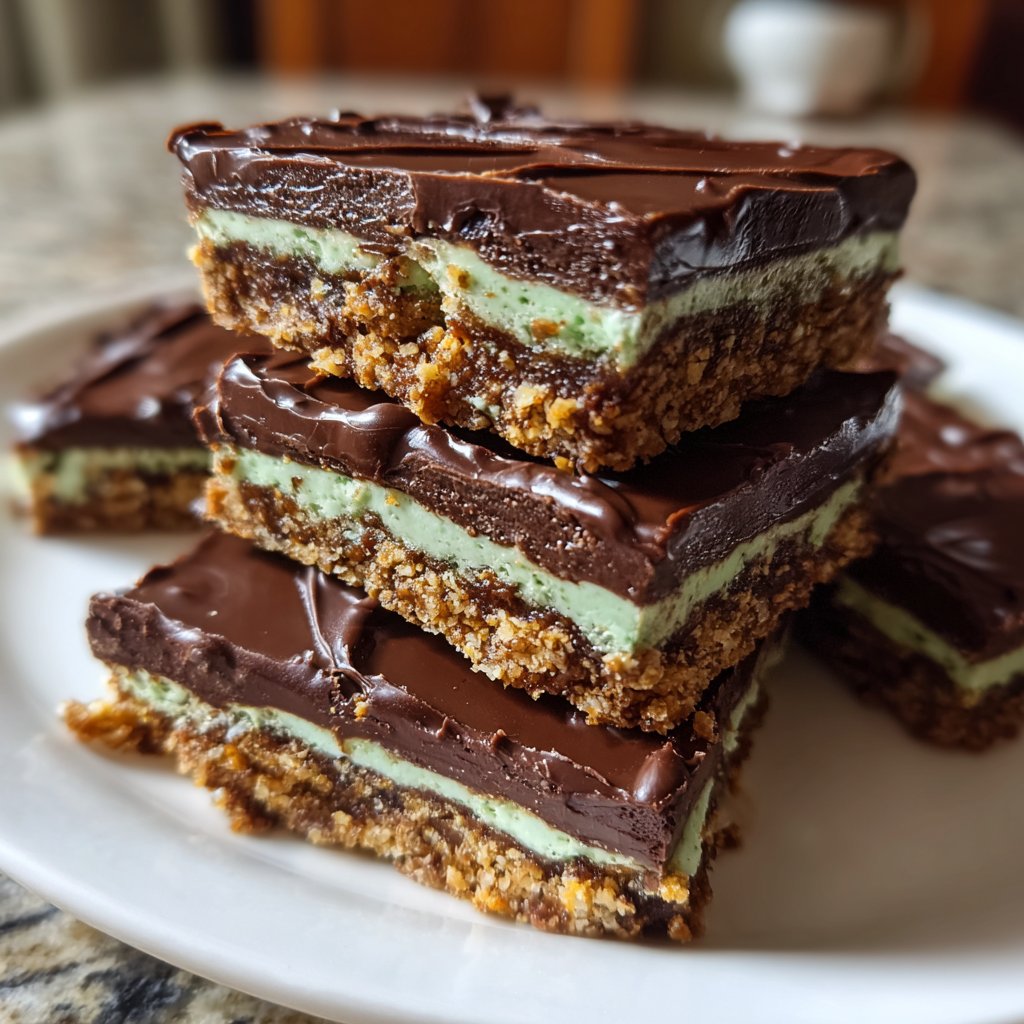
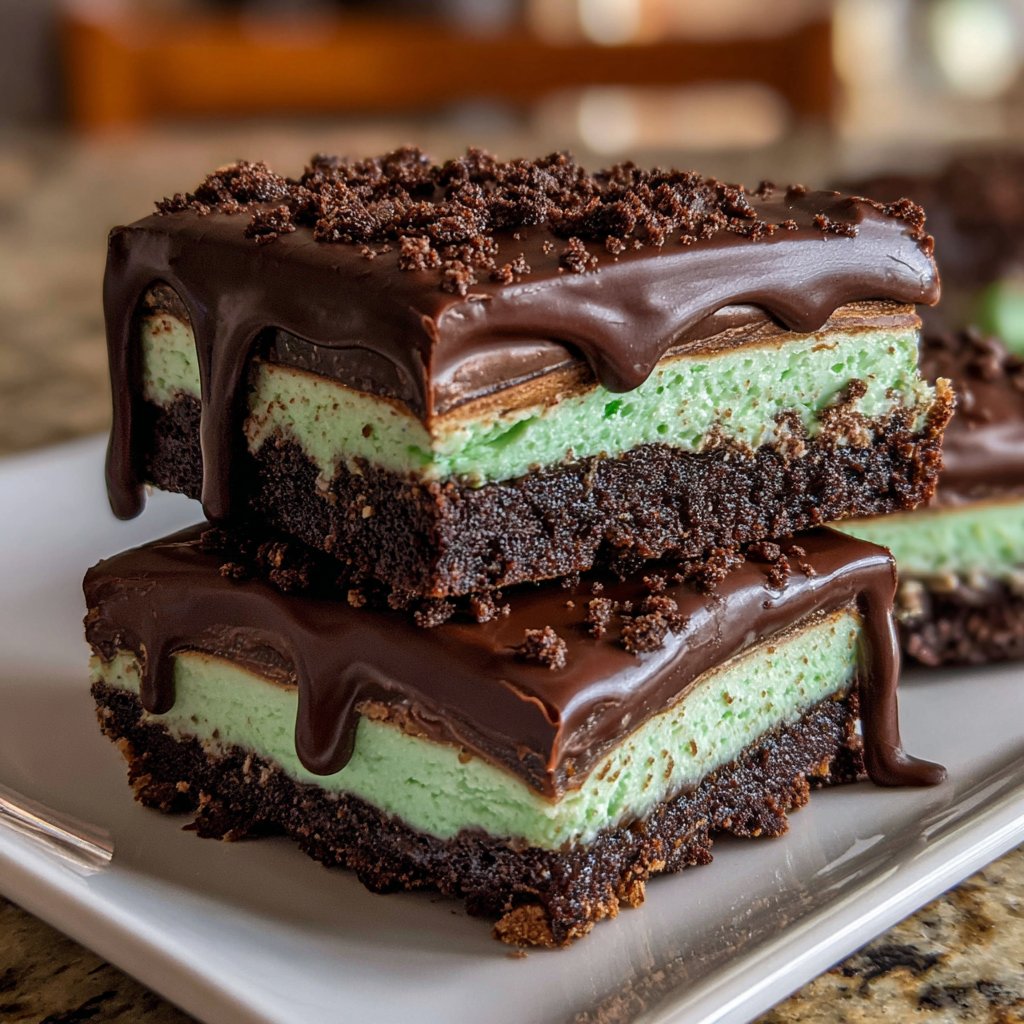
Chocolate Mint Slice Bars
Highlighted under: Dessert & Baking Essentials
I love making these Chocolate Mint Slice Bars whenever I need a sweet treat that has a little something extra. The combination of rich chocolate and refreshing mint is simply irresistible, and I can never have just one! The layers are easy to create, and the texture is perfectly indulgent. These bars are perfect for sharing at gatherings or just enjoying at home with a cup of coffee. Trust me, your friends and family will be asking for the recipe!
When I first experimented with these Chocolate Mint Slice Bars, I wanted to capture the essence of a classic dessert while adding my personal twist. The mint complements the chocolate beautifully, giving each bite a refreshing lift. I discovered that using peppermint extract instead of fresh mint worked wonders for keeping the layers distinct without being overwhelming.
One of the best tips I’ve found is to chill the bars in the fridge before slicing them. This helps create clean edges and makes it easier to cut through the rich layers. Trust me, once you try them, you’ll see why they’ve become a family favorite!
Why You'll Love These Bars
- Decadent chocolate flavor with a refreshing mint twist
- Layers of texture that create a delightful experience
- Perfect for parties, holidays, or an afternoon treat
Creating the Perfect Base Layer
The base layer is crucial for setting the tone of your Chocolate Mint Slice Bars. Using crushed digestive biscuits not only adds a satisfying crunch but also lends a subtle sweetness that balances the richness of the chocolate. When combining the ingredients, make sure that the melted butter is evenly distributed throughout the biscuit mixture, as this ensures a cohesive texture. Press it firmly into the bottom of the pan to prevent crumbling once set. A flat-bottomed measuring cup can be helpful to achieve an even surface.
If you’re looking for alternatives to digestive biscuits, consider using graham crackers or even chocolate cookie crumbs for a richer base. However, keep in mind that different biscuits may require slight adjustments in sugar or butter to maintain the desired texture. If you find the mixture too dry, a teaspoon or two of milk can help bind it better.
Mastering the Mint Layer
The mint layer is what truly elevates these bars, so achieving the right balance of flavor and texture is essential. Be sure to sift the powdered sugar before mixing it with the other ingredients; this helps eliminate lumps that could affect the smoothness of the layer. When incorporating the peppermint extract, start with a lesser amount and adjust to your taste preference, as some extracts can be quite potent.
For a more vibrant color, feel free to experiment with the amount of green food coloring. Adding a few drops at a time will allow you to find the perfect shade without overwhelming the natural appeal of the mint. If you're looking to avoid artificial colors altogether, substituting with spirulina powder can provide a natural green hue.
Perfecting the Chocolate Topping
The chocolate topping must be silky and smooth to create a beautiful finish. When melting chocolate chips and coconut oil together, use a microwave-safe bowl. Heat in 30-second intervals to prevent burning, as chocolate can seize up quickly if overheated. Stirring between intervals is crucial for even melting. Once melted, avoid excessive mixing, as too much air can create a dull appearance rather than a shiny glaze.
If you want to add a touch of creativity, consider infusing the chocolate topping with your favorite flavor, such as espresso powder or a sprinkle of sea salt for a sophisticated twist. Additionally, if coconut oil isn’t available, substituting with vegetable shortening can yield a similar glossy finish. This topping can also be used for other desserts, making it a versatile addition to your kitchen repertoire.
Ingredients
Gather these ingredients to get started:
For the Base Layer
- 1 cup crushed digestive biscuits
- 1/2 cup unsalted butter, melted
- 1/2 cup granulated sugar
- 2 tablespoons cocoa powder
For the Mint Layer
- 1 cup powdered sugar
- 2 tablespoons unsweetened cocoa powder
- 2 tablespoons butter, softened
- 1 teaspoon peppermint extract and a few drops of green food coloring
For the Chocolate Topping
- 1 cup semi-sweet chocolate chips
- 1 tablespoon coconut oil
Make sure to have all the ingredients ready to ensure a smooth preparation.
Preparation Steps
Follow these steps to create your delicious bars:
Prepare the Base
In a mixing bowl, combine crushed digestive biscuits, melted butter, granulated sugar, and cocoa powder. Mix well until all ingredients are combined and the mixture resembles wet sand. Press evenly into the bottom of a greased 9x9 inch pan.
Make the Mint Layer
In another bowl, beat together powdered sugar, cocoa powder, softened butter, peppermint extract, and green food coloring until smooth. Spread this mint mixture over the base layer in the pan, smoothing it out evenly.
Prepare the Chocolate Topping
Melt the chocolate chips and coconut oil together in a microwave-safe bowl in 30-second intervals, stirring in between until smooth. Pour the melted chocolate over the mint layer and spread evenly.
Chill and Slice
Cover the pan and refrigerate for at least 1 hour until set. Once set, remove from the pan and cut into bars. Serve chilled or at room temperature.
Enjoy your homemade Chocolate Mint Slice Bars!
Pro Tips
- For a special touch, consider garnishing these bars with crushed peppermint candies before the chocolate sets.
Storage Tips
To maintain the freshness of your Chocolate Mint Slice Bars, wrap them tightly in plastic wrap or store them in an airtight container in the refrigerator. They can last up to one week chilled, but I recommend consuming them within four days for the best texture and flavor. If you prefer a colder treat, they also freeze well; just be sure to separate the layers with parchment paper before freezing to avoid sticking.
When ready to enjoy a frozen bar, let it thaw in the refrigerator for a couple of hours or on the counter for about 30 minutes, ensuring that the layers remain intact and delicious. Freezing can also help intensify the flavors, especially the mint, making for a refreshing bite on a hot day.
Serving Ideas
These Chocolate Mint Slice Bars are incredibly versatile and can be served in various ways. For an elegant presentation, consider garnishing each bar with a sprinkle of crushed peppermint candies or a drizzle of white chocolate. This not only enhances the visual appeal but adds a delightful crunch that complements the soft bars.
Additionally, serving them with a scoop of vanilla or mint ice cream can transform your dessert into a showstopper. For a fun twist, consider pairing the bars with a homemade hot cocoa, allowing the chocolate and mint flavors to meld beautifully. These serving suggestions elevate the dessert and make it perfect for special occasions or gatherings.
Questions About Recipes
→ Can I use different cookies for the base?
Yes, you can use graham crackers or Oreo cookies for a different flavor.
→ How long can I store these bars?
Store them in the refrigerator for up to a week.
→ Can I use fresh mint instead of extract?
While fresh mint gives a different flavor, it can overpower the chocolate, so use it sparingly.
→ Is there a vegan version of this recipe?
You can substitute butter with coconut oil and use dairy-free chocolate for a vegan version.
Chocolate Mint Slice Bars
Created by: Ariana Brooks
Recipe Type: Dessert & Baking Essentials
Skill Level: Easy
Final Quantity: 12 bars
What You'll Need
For the Base Layer
- 1 cup crushed digestive biscuits
- 1/2 cup unsalted butter, melted
- 1/2 cup granulated sugar
- 2 tablespoons cocoa powder
For the Mint Layer
- 1 cup powdered sugar
- 2 tablespoons unsweetened cocoa powder
- 2 tablespoons butter, softened
- 1 teaspoon peppermint extract and a few drops of green food coloring
For the Chocolate Topping
- 1 cup semi-sweet chocolate chips
- 1 tablespoon coconut oil
How-To Steps
In a mixing bowl, combine crushed digestive biscuits, melted butter, granulated sugar, and cocoa powder. Mix well until all ingredients are combined and the mixture resembles wet sand. Press evenly into the bottom of a greased 9x9 inch pan.
In another bowl, beat together powdered sugar, cocoa powder, softened butter, peppermint extract, and green food coloring until smooth. Spread this mint mixture over the base layer in the pan, smoothing it out evenly.
Melt the chocolate chips and coconut oil together in a microwave-safe bowl in 30-second intervals, stirring in between until smooth. Pour the melted chocolate over the mint layer and spread evenly.
Cover the pan and refrigerate for at least 1 hour until set. Once set, remove from the pan and cut into bars. Serve chilled or at room temperature.
Extra Tips
- For a special touch, consider garnishing these bars with crushed peppermint candies before the chocolate sets.
Nutritional Breakdown (Per Serving)
- Calories: 380 kcal
- Total Fat: 26g
- Saturated Fat: 15g
- Cholesterol: 195mg
- Sodium: 85mg
- Total Carbohydrates: 32g
- Dietary Fiber: 3g
- Sugars: 24g
- Protein: 6g